Like many homeowners you’ve probably had stucco or popcorn ceilings at some point in your life. Incredibly popular in the 80’s, this form of ceiling treatment was used as a sound absorber and more often than not, as a quick way to hide imperfections.
Less popular today, the once textured ceiling is now becoming the textured accent wall and the outcomes are truly stunning. If you’re of the “no wallpaper ever” persuasion, then this might be the perfect solution for you. Not only will it give an interesting look and the appearance of depth to an otherwise flat wall, there are lots of texture styles and techniques to choose from.
We’ll explore them here today!
Before you dive in and commit to adding wall texture, be sure you determine why exactly you want to do it in the first place. Creativity? Hiding wall flaws? Soundproofing? A sense of depth and uniqueness? More important, are you going to attempt it yourself or hire an experienced painter to tackle the job. If you’re a DIYer, then make sure you prep the wall and the area thoroughly before starting to get maximum durability and longevity.
In this blog we’ll look 15 textures that are the most commonly used for interior wall treatments. Some can also be used for exterior but we’ll focus on the interior for this round.
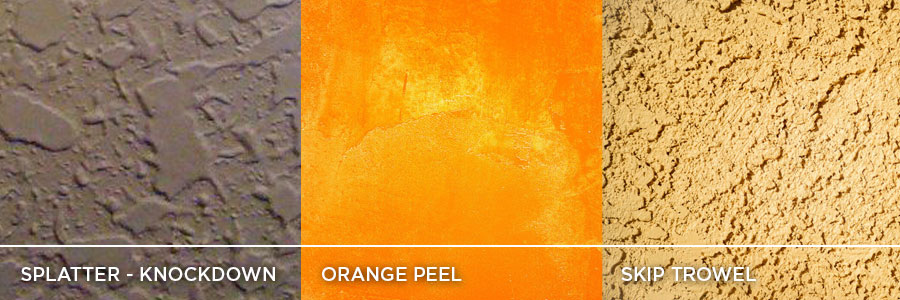
Splatter – Knockdown
A very detailed process utilizing multiple steps and experienced use of a knife. Done right, it’s a beautiful treatment but we feel this one is not really for the DIYer as it requires a bit more of a refined skill set.
Orange Peel
One of the most popular textures, orange peel resembles the splatter technique, only finer and bumpier on the surface. The application needs to be somewhat more consistent than splatter but the end product will be stunning.
Skip Trowel
Another one of the best choices, this texture is achieved by using, you guessed it, the trowel. A flat trowel is skimmed or “skipped” over the surface of the drywall as it is being textured to your chosen finish. Skip trowel is just a little more spaced and spread out than the knockdown texture.
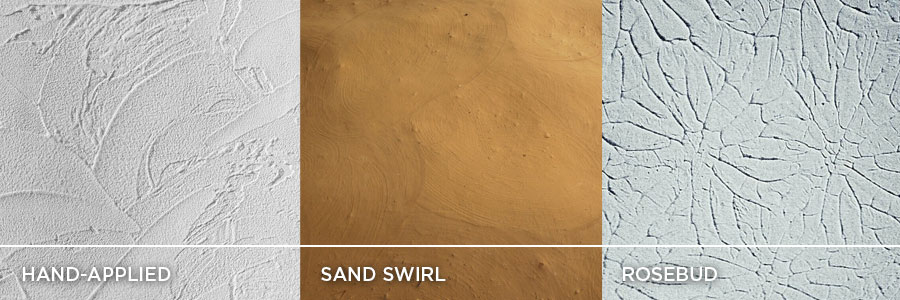
Hand-applied
The name says it all. If you’re looking to forgo the tools (except for the finishing parts) then this style is perfect for you. One of the better textures for the exterior, mud rooms or garages, the deliberately uneven look will add an interesting feel to any space.
Sand Swirl
Producing a bumpier texture, sand swirl is good for exterior walls or even in kids’ bedrooms. It does involve a number of texturing techniques so it’s another one we highly recommend for the professional.
Rosebud
This one is recommended for exterior treatments due to wall imperfections being more prevalent there. It gets it name from its rosebud stomping pattern. You need steady hands if you want all those rosebuds to be aligned.
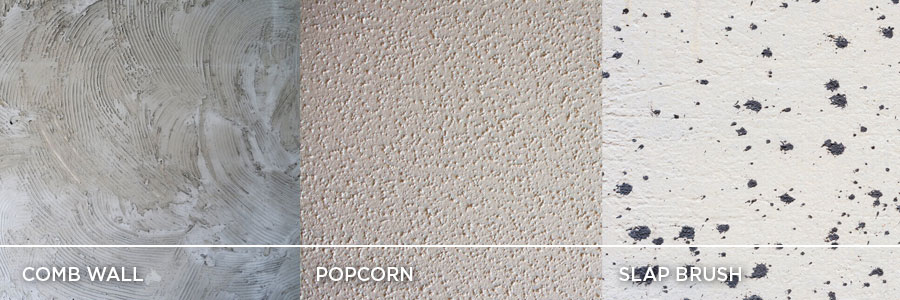
Comb Wall
A favourite of interior designers, the comb wall pattern creates a highly stylish effect of waves and lines on the wall. The nice part… it relatively easy. You can use a fork or any fine-lined tool to get that desired continuous texture.
Popcorn
Typical for ceilings, this one can also be applied to walls for cool effect. Its great for sound-proofing and hiding defects and general wall unevenness. And hey, if you want that 1970’s look this one’s for you!
Slap Brush
You will need a panda paw or a stomp brush for this one. This is primarily for walls with very visible defects. After the drywall compound is smoothly applied, stamp it with a stomp brush until you get the desired effect.
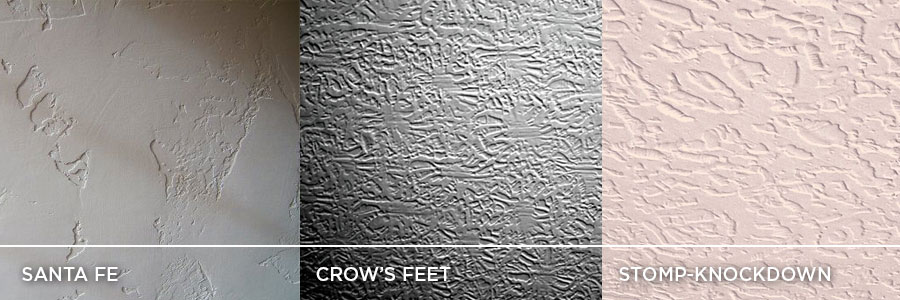
Santa Fe
Unique in its two-layered approach, the Santa Fe texture is primarily used in patios, balconies and mudrooms due to its distracting pattern. It does however, fit perfect with homes that are done in more neutral tones. Or, you could try it with a more vibrant colour and see what happens. It could be the coolest looking room in the house.
Crow’s Feet
This one can get a bit messy due to using wet mud but, the effect can be pretty cool. Using a bristle brush or paint roller, twisting from left to right several times until you get your desired, unique look.
Stomp – Knockdown
Again a variant of the knockdown style, but instead of using a drywall knife, one would use a paint roller and stomp brush. Compound mud applied directly to the drywall is how this one is done.
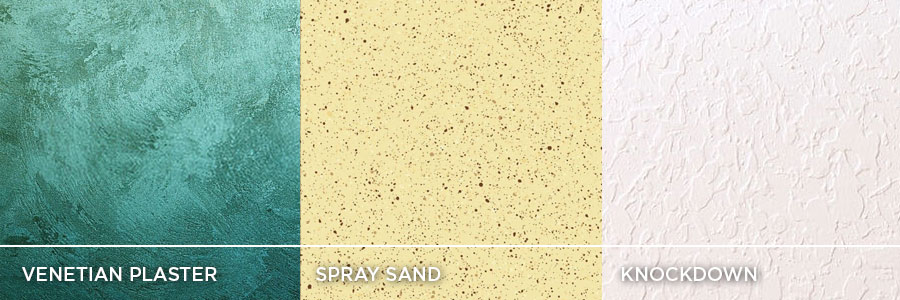
Venetian Plaster
I think this one is probably our favourite look. It really resembles raw concrete. Applied thinly, the texturing is attained by using marble dust combined with compound mud or putty. It’s then buffed and sanded to get its trademark appearance.
Spray Sand
This on is interesting because of the gritty texture. The mixture is composed of primer, water, and a bag of sand. It is left overnight before it is applied to the wall. It’s a great look for stuccos and will last a long time. It’s an excellent choice for almost any room in the house.
Knockdown
One of the easier textures to apply, knockdown goes well in kitchens, dining rooms, and living rooms. This can be achieved much the same as orange peel but, using a drywall knife. If you’re after something more contemporary, look no further!
There you have it. As you can see there’s so much to choose from and so many directions you could go! Adding a wall texture can give much need life to a static room… and the possibilities are indeed endless!
Thanks for visiting Alpha Painting Canada. Check us out next month when we’ll be showcasing some of our latest projects!


